Cupcake Banner

Saturday, May 31, 2014

Natural alternative to Pedialite

Last week my son was really sick, I didn't know exactly what he had but his symptoms included fever, cough and more coughing which lead him to vomit for 5 day days straight. I called the Pediatrician and she recommended I give my son Pedialyte and ginger ale. 

Those recommendation never sat well with me especially cause we don't buy any artificially dyed drinks in our home or soda so why would I want to give it to my son as a way to make him feel better? So right away I called my Mom, who is my go- to person for natural remedies and asked her for a "natural" drink alternative with electrolytes and she immediately said coconut water! The more I read up on it I found that the sugar content was equal to any of the sugary pedialyte drinks if not less but more importantly it was a earth made product.

So off to whole foods we went, to get our coconut. I chose to buy a real coco as oppose to a packaged drink because the drink that is the most pure and raw cost $8, and this coconut was $3 

Other fun facts about coconut water:
It's identical to human blood plasma meaning everytime you drink it, you're  getting a blood transfusion. It purifies, energizes and hydrates better than any artificial sports drink out there. 

      Long unpronounceable ingredients
              Artificial flavor and color not  to       mention nasty flavor 

The challenge with this coconut is getting it open. You will need you longest kitchen knife to just wack and wack until you get an opening big enough to fit a straw.


               Cold and delicious  


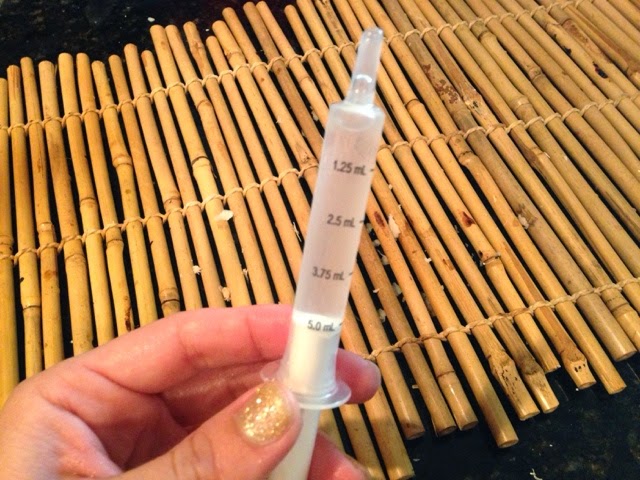
My son wasn't too interested or feeling well enough to drinking so I had to whip out my secret weapon and inject some into his mouth. 


Wednesday, February 12, 2014

Whole Wheat Beet Colored Valentine Cookies


So this post isn't really going to be a "how to" recipe. I wasn't at my house and it was a bit chaotic with a bunch of kids and family around and I didn't take all the pictures I wanted... but I promised my 4 year old, Liam that we'd make our traditional valentines cookies and here are some pics on our experience.

I had a few beets on hand and just bought a new bag of whole wheat pastry flour so I thought we'd take a natural approach this year and use the beet for coloring and not use some unprocessed bleached flour. This took WAY longer than I wanted it to.  I don't know if I have the paitece to sift, then cream the sugar and butter every time I bake but the fact that I was using some natural ingredients gave me all the excitement I needed to finish the job. The cookies turned out so soft and yummy. They had a slight wheat flavor but it was way more mild that any red wheat flour. The frosting was whipped and gave a nice touch of sweetness.


How to use the beets for coloring: 

I used 2 beats, chopped and boiled them till soft about 20 min. All you really need is half of 1 beet to get the few drops of color needed for your frosting and even that is more than enough. 

The water will turn red pretty fast. Once you make your frosting add 3-4 drops of the beet liquid adding more to darken the color. I did find that if I added more than 4 drops the frosting became gloopy and started to seperate so don't know if it possible to get a dark red color. 

I also added 2drops to a few spoonfuls of natural raw sugar. You have to mix it till it turns color, then leave it out to dry and crystallize. Once it's absorbed moisture you can crumble it on top of the buttercream frosting. 

Soft Whole Wheat Sugar Cookie:

3 1/4 c. Bobs Mill Whole Wheat Pastry Flour
1 t. Baking Soda
1/2 t. Salt
1/2 c. Soft Butter
1 c. Sugar
1 Egg
1 1/2 t. Vanilla
1/2 c. Sour cream

Stir together flour, soda, and salt. Set aside Cream together butter, sugar, egg and vanilla. Add sour cream and half of flour mixture. Mix one minute. Stir in remaining flour mixture. Roll dough on lightly floured surface to 1/2 inch thick. Cut with valentine cookie cutter. Bake 8-10 min on greased cookie sheet at 400 degrees.  


Beet Butter Cream Frosting:

1/2 c. Softened butter 
1/3 cup of almond milk
4 1/2 Natural raw sugar 
1 tsp Vanilla or almond extract
1tsp beet liquid 


Enjoy!
Happy Valentines Day XOXO, Lily 


Thursday, January 23, 2014

Dinosaur Birthday Party for a 4yr Old

Here are the details for my sons 4th DINO-Mite Birthday party
What went in the goodie bags. Stamps, tattoo, mini dinos & Dino eggs were purchased on Amazon. Eraser from the dollar store and candy was BOGO at publix :) 

My assembly line

Putting together the banner. This was my labor of love. It took me many countless hours to put together, between cutting, gluing and using the cricket, this took way longer than I expected and I fully understood why that cute banner I saw on Etsy was $50....In the end mine cost about $26. 
                                     

THE BIG DAY 

My Palm tree branches gave my banner the right touch
Goodie bags 

The cake was from Publix. I actually didn't like any of the cakes from their book, so I told them what I wanted and this is what they created. I told them to make the volcano the focal point of the cake so I kinda laughed when I saw this tiny little volcano but it wasn't bad enough to complain. I added a cool touch by writing my sons name in Dinosaur "Liamsaurus"  

Bearded Dragon and other exotic animals added the perfect pre historic touch to the party. 
                            

Liam doing his best impression on a Carnitor 


Balloon color scheme: Chocolate brown and two tones of greens

Table decor was purchased at the dollar store. I bought 3 bags of moss and black "volcano" rocks. I loved how it turned out. I saved on decor budget because Liam already owned so many dinosaurs. 

Friday, December 20, 2013

Homemade Fruit Popsicles


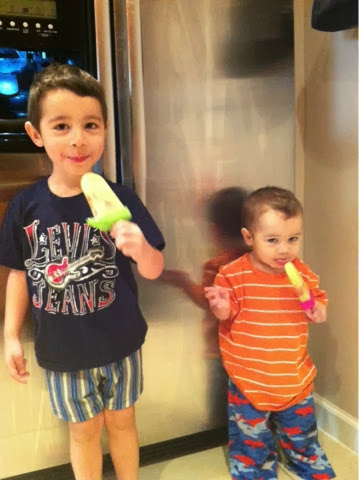
Now this is the way to enjoy a popcicle. All natural, homemade with love,small chunks of fruit and good for you! It's the kind of treat you don't have to feel guilty giving your kids. And they will have tons of fun making them. Just a heads up, you may have to indure hours of "are they ready yet". We made them last night and when we woke up this morning Liam was so excited, like Christmas morning excited to run downstairs and try out his creation.

Here's what you'll need: 

Half a honeydew
1cup of water
Strawberries
Popsicle trays 

Add honeydew and water to a blender and blend until it's smooth and silky. You will need to pour through a strainer to get rid of the foam that rises to the top. 

Obviously you can make as many as you like but this amout filled 2 trays with 4 popsicles each making 8 total. The trays are "jelly bean" brand, from publix and I really like that the sticks are designed to catch melting juice and can be sipped through the pointed lip on the side of each one.  

 We took 2 long slices of the honey few and cut them into tiny bite size chunks. This just makes them cuter and the strawberry just adds a pop of color and surprise flavor. Start off by adding some fruit, followed by juice then more fruit on top. 

Popsicles for breakfast...no problem :)


Tuesday, November 26, 2013

Holiday Girly Nail Art

I have seriously been slacking on my nail game. I used to have a new look every week but I have been so busy that I usually spend my alone time cleaning these day, so no nails for me :( I had seen some similar looks like this using summer colors so I wanted to recreate a winter version. I love how they turned out. Here is the step by step process how to make these flowers. It is easy to recreated but may require some practice on a paper plate before you try it on your nails. 

                     Finished look 
                   What you'll need:
-Top coat-OPI, Nail envy
-A deep crandberry red color
- A pink thin nail art polish 
- A green polish for the leaves 
- Revlon quick dry top coat

     Start off with a top coat on all the nails, then paint your middle finger white 
Make 3 dots like this by pressing down with the brush, they don't have to be perfect circles 
Add a small dot to the middle using a thin nail art polish brush. You can find them at the dollar store, I did. 
This next part is tricky and as you can see mine isn't perfect but add 2 curved lines above and below the dot to mimic the petals of a rose 
Then add the leaves by using the tip of your green polish using small swiping motions to the right and left of the rose. 
Finish off the look by painting your pointer and ring finger gold and your pinky and thumb the same color you used for the main color of your rose. Then a top it off with a quick dry. Wait a few minuites before adding the quick dry to the rose nail, as it could smudge. 

Tag me on Instagram @lilycupcake if you recreate this look. #cupcakemommylife I'd love to see it :)

Written with love, 
Lily 


Monday, November 18, 2013

Whole Foods "Green Dream" smoothie recipe


You all know I've been on a juicing tip, but more recently I've been going back and forth between juicing and making green smoothies. What I like about smoothies is that what you blend is what you get, unlike juicing that shoots out pulp and other stuff that could nutritious and beneficial ( I keep meaning to look up things to make with all that pulp, I always feel so wasteful when I throw it out)

Anyway, I was at Whole Foods the other day and they were giving out samples of a green smoothie called "Green Dream". It was probably the most delicious green drink I had ever had! So I asked the guy to give me a detailed step by step instruction on how they make it and he was kind enough to share their "secrets" with me, hope he doesn't get fired :) 
The menu board says: Spinach, Kale Apple, Pineapple Now I'm going to unveil the "secret" to you and  
how to make it taste as yummy as theirs and now mine! 

What you'll need:
2-3 large freshly juiced gala apples (secret #1, juiced apples)
1 large handful of spinach  (They don't measure, just use a generous handful secret #2)
1 large handful of Kale (same secret as above)
1/2 cup frozen pineapple (Biggest secret of them all, use frozen)


Packed full of greens
                                 
   
Love that bright green color...come to mama

Enjoy and tag me on instagram if you end up making it @lilycupcake

Love,
Lily